
Four common mistakes when writing your first unit tests
29 Mar 2021 #tutorial #csharpLast time, we covered how to write our first unit tests with C# and MSTest. We started from a Console program and converted it into our first unit tests. We wrote those tests for Stringie, a (fictional) library to manipulate strings with more readable methods. This time, we will cover how NOT to write unit tests. These are four common mistakes we should avoid when writing our first unit tests.
TL;DR
- Do not follow a naming convention
- Do not use the right assertion methods
- Do not have a single assertion per test
- Repeat logic in your assertions
Mistake 1: Do not follow a naming convention
First, keep your tests in the right place. Have one test project per project, one test class per class. Add the suffix “Tests” in the name of your test projects and classes.
Choose a naming convention for your test names and stick to it.
In our previous post, we covered two naming conventions. An “ItShould” sentence and the “UnitOfWork_Scenario_ExpectedResult”, a three-part name separated with underscores. You can choose the one you like the most.
That time, for Stringie Remove() method, following the “UnitOfWork_Scenario_ExpectedResult” convention, we wrote test names like these ones:
[TestClass]
public class RemoveTests
{
    [TestMethod]
    public void Remove_ASubstring_RemovesThatSubstring() { }

    [TestMethod]
    public void Remove_NoParameters_ReturnsEmpty() { }
}
Every test should tell the scenario under test and the expected result. We shouldn’t worry about long test names. But, let’s stop naming our tests: Test1, Test2, and so on.
Don’t prefix our test names with “Test.” If we’re using a testing framework that doesn’t need keywords in our test names, let’s stop doing that. With MSTest, we have attributes like [TestClass] and [TestMethod] to mark our methods as tests.
Also, don’t use filler words like “Success” or “IsCorrect” in our test names. Instead, let’s tell what “success” and “correct” means for that test. Is it a successful test because it doesn’t throw exceptions? Is it successful because it returns a value? Make your test names easy to understand.
I’ve included these mistakes and more lessons in my book Start Testing. A step-by-step guide to writing your first C# unit tests with confidence.
Mistake 2: Do not use the right assertion methods
Follow the Arrange/Act/Assert principle. Separate the body of your tests to differentiate these three parts.
For the Assert part of your tests, make sure to use an assertion library. MSTest, NUnit, and XUnit are the three most popular ones for C#.
Use the right assertion methods of your library. For example, MSTest has assertion methods for strings, collections, and other objects. For a list of the most common MSTest assertions methods, check the MSTest Cheatsheet in Unit Testing 101.
Please, don’t do.
Assert.AreEqual(null, result);
// or
Assert.AreEqual(true, anotherResult);
Prefer.
Assert.IsNull(result);
// or
Assert.IsTrue(anotherResult);

Mistake 3: Do not have a single assertion per test
Have only one Act and Assert part in your tests. Don’t repeat the same Act part with different test values in a single test.
Please, avoid writing tests like this one.
[TestMethod]
public void Remove_SubstringWithDifferentCase_RemovesSubstring()
{
    var str = "Hello, world!";

    var transformed = str.RemoveAll("Hello").IgnoringCase();
    Assert.AreEqual(", world!", transformed);

    transformed = str.RemoveAll("HELLO").IgnoringCase();
    Assert.AreEqual(", world!", transformed);

    transformed = str.RemoveAll("HeLlO").IgnoringCase();
    Assert.AreEqual(", world!", transformed);
}
Here, we tested the same method with different test values in a single test.
Also, avoid writing tests like this one.
[TestMethod]
public void Remove_SubstringWithDifferentCase_RemovesSubstring()
{
    var str = "Hello, world!";

    var testCases = new string[]
    {
        "Hello",
        "HELLO",
        "HeLlO"
    };
    string transformed;
    foreach (var str in testCases)
    {
        transformed = str.RemoveAll("Hello").IgnoringCase();
        Assert.AreEqual(", world!", transformed);
    }
}
This time, to avoid repetition, we put the test values in an array and looped through them to test each value.
If we want to test the same scenario with different test values, let’s use parameterized tests instead.
How to write Parameterized tests with MSTest
To write a parameterized test with MSTest, we can follow these steps:
- Replace the
[TestMethod]attribute with the[DataTestMethod]attribute in your test. - Add
[DataRow]attributes for each set of test values. - Add parameters for each test value inside the
[DataRow]attributes. - Use the input parameters in your test to arrange, act or assert.
Let’s convert the previous test with repeated test values into a parameterized test.
[DataTestMethod]
[DataRow("Hello")]
[DataRow("HELLO")]
[DataRow("HeLlo")]
public void Remove_SubstringWithDifferentCase_RemovesSubstring(string substringToRemove)
{
    var str = "Hello, world!";

    var transformed = str.RemoveAll(substringToRemove).IgnoringCase();

    Assert.AreEqual(", world!", transformed);
}
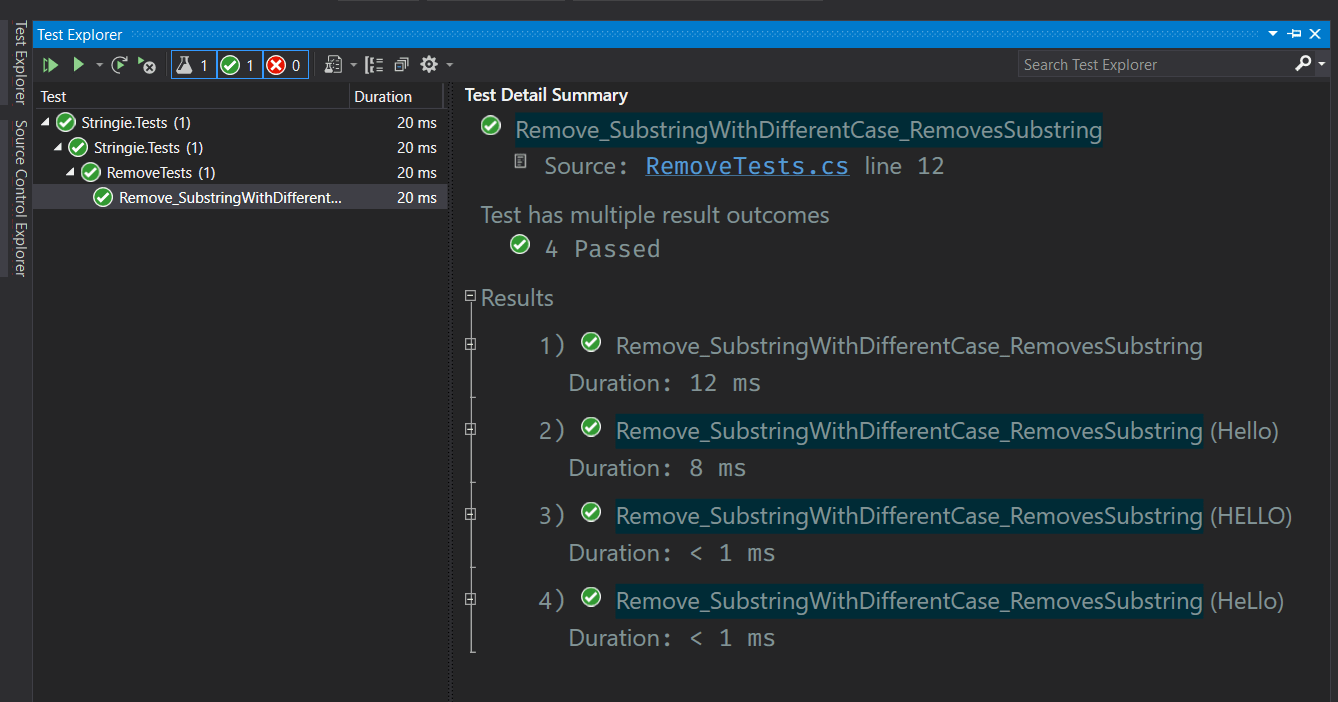
With parameterized tests, we have separate tests. Inside Visual Studio, in the “Test Explorer” menu, we will have one result per each [DataRow] attribute in the parent test.
It’s easier to troubleshoot parameterized tests when our tests fail for a single test value.
Mistake 4: Repeat logic in your assertions
I can’t stress this enough.
Don’t repeat the logic under test in your assertions. Use known, hard-coded, pre-calculated values instead.
We shouldn’t copy the tested logic and paste it into a private method in our tests to use it in our assertions. We will have code and bugs in two places.
Please, don’t write assertions like the one in this test.
[TestMethod]
public void Remove_ASubstring_RemovesThatSubstringFromTheEnd()
{
    string str = "Hello, world!";

    string transformed = str.Remove("world!").From(The.End);

    var position = str.IndexOf("world!");
    var expected = str.Substring(0, position);
    Assert.AreEqual(expected, transformed);
}
For this test, instead of using the Substring() method to remove the input string, use a known expected value. Write Assert.AreEqual("Hello,", transformed). For example,
[TestMethod]
public void Remove_ASubstring_RemovesThatSubstringFromTheEnd()
{
    string str = "Hello, world!";

    string transformed = str.Remove("world!").From(The.End);

    // Let's use a known value in our assertions
    Assert.AreEqual("Hello,", transformed)
}
Voilà! These are four common mistakes when writing our first unit tests. Remember to put your test in the right places following a naming convention. Also, keep one assertion per test, and don’t repeat logic in your assertions. You will have better tests by avoiding these mistakes.
If you want to practice identifying and fixing these mistakes, check my Unit Testing 101 repository. You will find the tests that Stringie developers wrote and some other misatkes mistakes they made. Your mission, Jim, should you choose to accept it, is to fix them.

If you’re new to unit testing, read my post Unit Testing 101 to write your first unit tests in C#. Take a closer look at that last mistake on my post Don’t duplicate logic in your Asserts. For more advanced tips on writing unit tests, check my post how to write good unit tests.
And don’t miss the rest of my Unit Testing 101 series for more subjects on unit testing.
Happy testing!